めちゃめちゃ簡単 Google Analytics API for PHP の初期設定
スポンサーリンク
Google AnalyticsのデータをPHP経由で取得してくるやり方。
node.jsの場合は以下で過去に書いたが、PHPでとってくるような要件がでてきたのでここに記す。
[環境]
windows 10
PHP 5.6.30(xampp)
Composer version 1.5.5 2017-12-01 14:42:57
[目次]
準備
Composerのインストール
Introduction - Composerのリンクから「Composer-Setup.exe」をダウンロードしなにも考えずにダブルクリックでインストール。
Google Analyticsのライブラリのインストール
composer require google/apiclient:^2.0
証明書の配置
これをやらないと以下のエラーになる。
PHP Fatal error:  Uncaught exception 'GuzzleHttp\Exception\RequestException' with message 'cURL error 60: SSL certificate problem: unable to get local issuer certificate (see http://curl.haxx.se/libcurl/c/libcurl-errors.html)' in C:\develop\ga-php\vendor\guzzlehttp\guzzle\src\Handler\CurlFactory.php:187
Stack trace:
cacert.pemをダウンロードし、「C:\xampp\php\extras\ssl\cacert.pem」として配置。
その後、php.ini(C:\xampp\php)内の以下の部分を以下の通りにする。
;;;;;;;;;;;;;;;;;;;;
; php.ini Options  ;
;;;;;;;;;;;;;;;;;;;;

curl.cainfo = "C:\xampp\php\extras\ssl\cacert.pem"
Google Developer Consoleでサービスアカウントの作成
はじめてのアナリティクス API: サービス アカウント向け PHP クイックスタート | アナリティクス Core Reporting API | Google Developers
上記の通りですが、セットアップぺージへ進み以下の操作で、jsonファイルをダウンロードします。ファイル名は「service-account-credentials.json」とし、comoposerでライブラリをインストールしたディレクトリのおきます。
[サービス アカウント] ページを開きます。プロンプトが表示されたら、 プロジェクトを選択します。
[サービス アカウントを作成] をクリックします。
[サービス アカウントを作成] ウィンドウで、サービス アカウントの名前を 入力して [新しい秘密鍵の提供] を選択します。
サービスアカウントのメールアドレスの取得
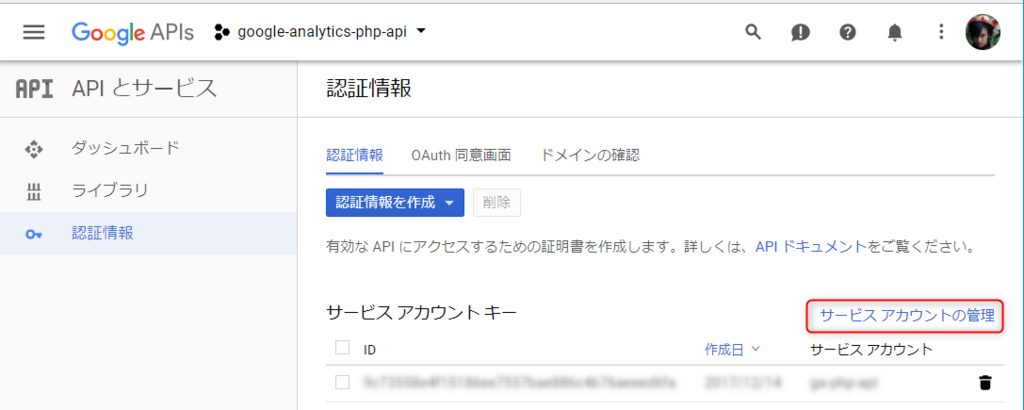
Google Cloud Platformに進み、プロジェクト名を上のステップで作成した名前を指定。

中央右の「サービスアカウントの管理」をクリック

赤枠のメールアドレスをコピー

Google Analyticsのユーザ管理にてメールアドレスを割り当て
上のステップで取得したメールアドレスを、ユーザ管理の「表示/分析」権限で割り当て。
Google Developer ConsoleでGoogle Analytics APIの使用を割りあて
これをしないと以下のエラーが出る。
PHP Fatal error: Uncaught exception 'Google_Service_Exception' with message '{"error":{"errors":[{"domain":"usageLimits","reason":"accessNotConfigured","message":"Project xxxxxxxxxxxx is not found and cannot be used for API calls. If it is recently created, enable Google Analytics API by visiting https://console.developers.google.com/apis/api/analytics.googleapis.com/overview?project=xxxxxxxxxxxxxx then retry. If you enabled this API recently, wait a few minutes for the action to propagate to our systems and retry.","extendedHelp":"https://console.developers.google.com/apis/api/analytics.googleapis.com/overview?project=1071524862661"}],"code":403,"message":"Project xxxxxxxxxxxxx is not found and cannot be used for API calls. If it is recently created, enable Google Analytics API by visiting https://console.developers.google.com/apis/api/analytics.googleapis.com/overview?project=xxxxxxxxxxxxx then retry. If you enabled this API recently, wait a few minutes for the action to propagate to our systems and retry."}}' in C:\develop in C:\develop\ga-php\vendor\google\apiclient\src\Google\Http\REST.php on line 118
ダッシュボードに移り「APIとサービスの有効化」をクリック

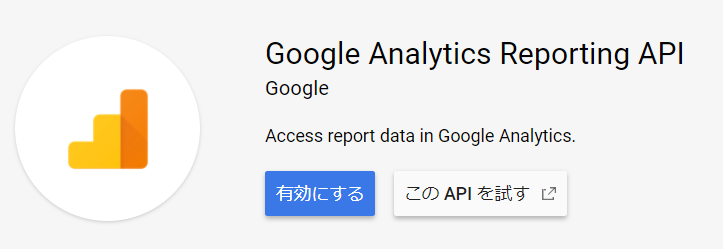
Google AnalyticsのAPIを見つける。(右側をクリック、、、失礼)

有効化する。

テスト実行
はじめてのアナリティクス API: サービス アカウント向け PHP クイックスタート | アナリティクス Core Reporting API | Google Developers
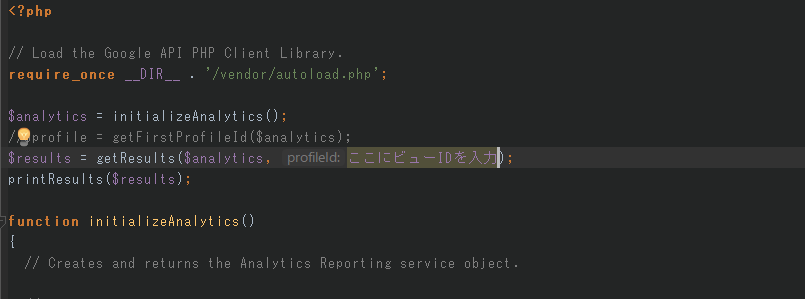
上記に記載がある、「HelloAnalytics.php」ファイルをダウンロードし実行。
C:\develop\ga-php>php HelloAnalytics.php
No results found.
こんな感じででればOK。
このサンプルプログラムでは、Google Analyticsの最初のプロパティが選ばれてデータ出力される関係で、僕のアカウントの最初のプロパティのサイトは実質稼働していないのでこの結果。
実稼働しているサイトのプロパティで見ると(以下のように配列番号を1にすると)結果がでる。
    if (count($properties->getItems()) > 0) {
      $items = $properties->getItems();
      $firstPropertyId = $items[1]->getId();
結果。
C:\develop\ga-php>php HelloAnalytics.php
First view (profile) found: All Web Site Data
Total sessions: 1963

